
Get Started with a Dedicated Amazon Shipping Account
Connect Amazon Shipping to ShipScience for Claims, Invoices, and Tracking
Overview
ShipScience connects to Amazon Shipping to retrieve invoice data, track shipments, and file and manage eligible claims.
Before you begin:
To connect Amazon Shipping to ShipScience, you will need:
- An active ShipScience account
- Access to the Data Sources page in ShipScience
- An active Amazon Shipping account for your organization
- An Amazon Shipping administrator who can invite and manage users
NOTE: ShipScience will generate the email address and temporary password you should use when creating the dedicated Amazon Shipping user. Do not create the user before retrieving these credentials from the Data Sources page.
Step 1: Navigate to Data Sources in the ShipScience Web Application
-
Sign in to the ShipScience Web Application.
-
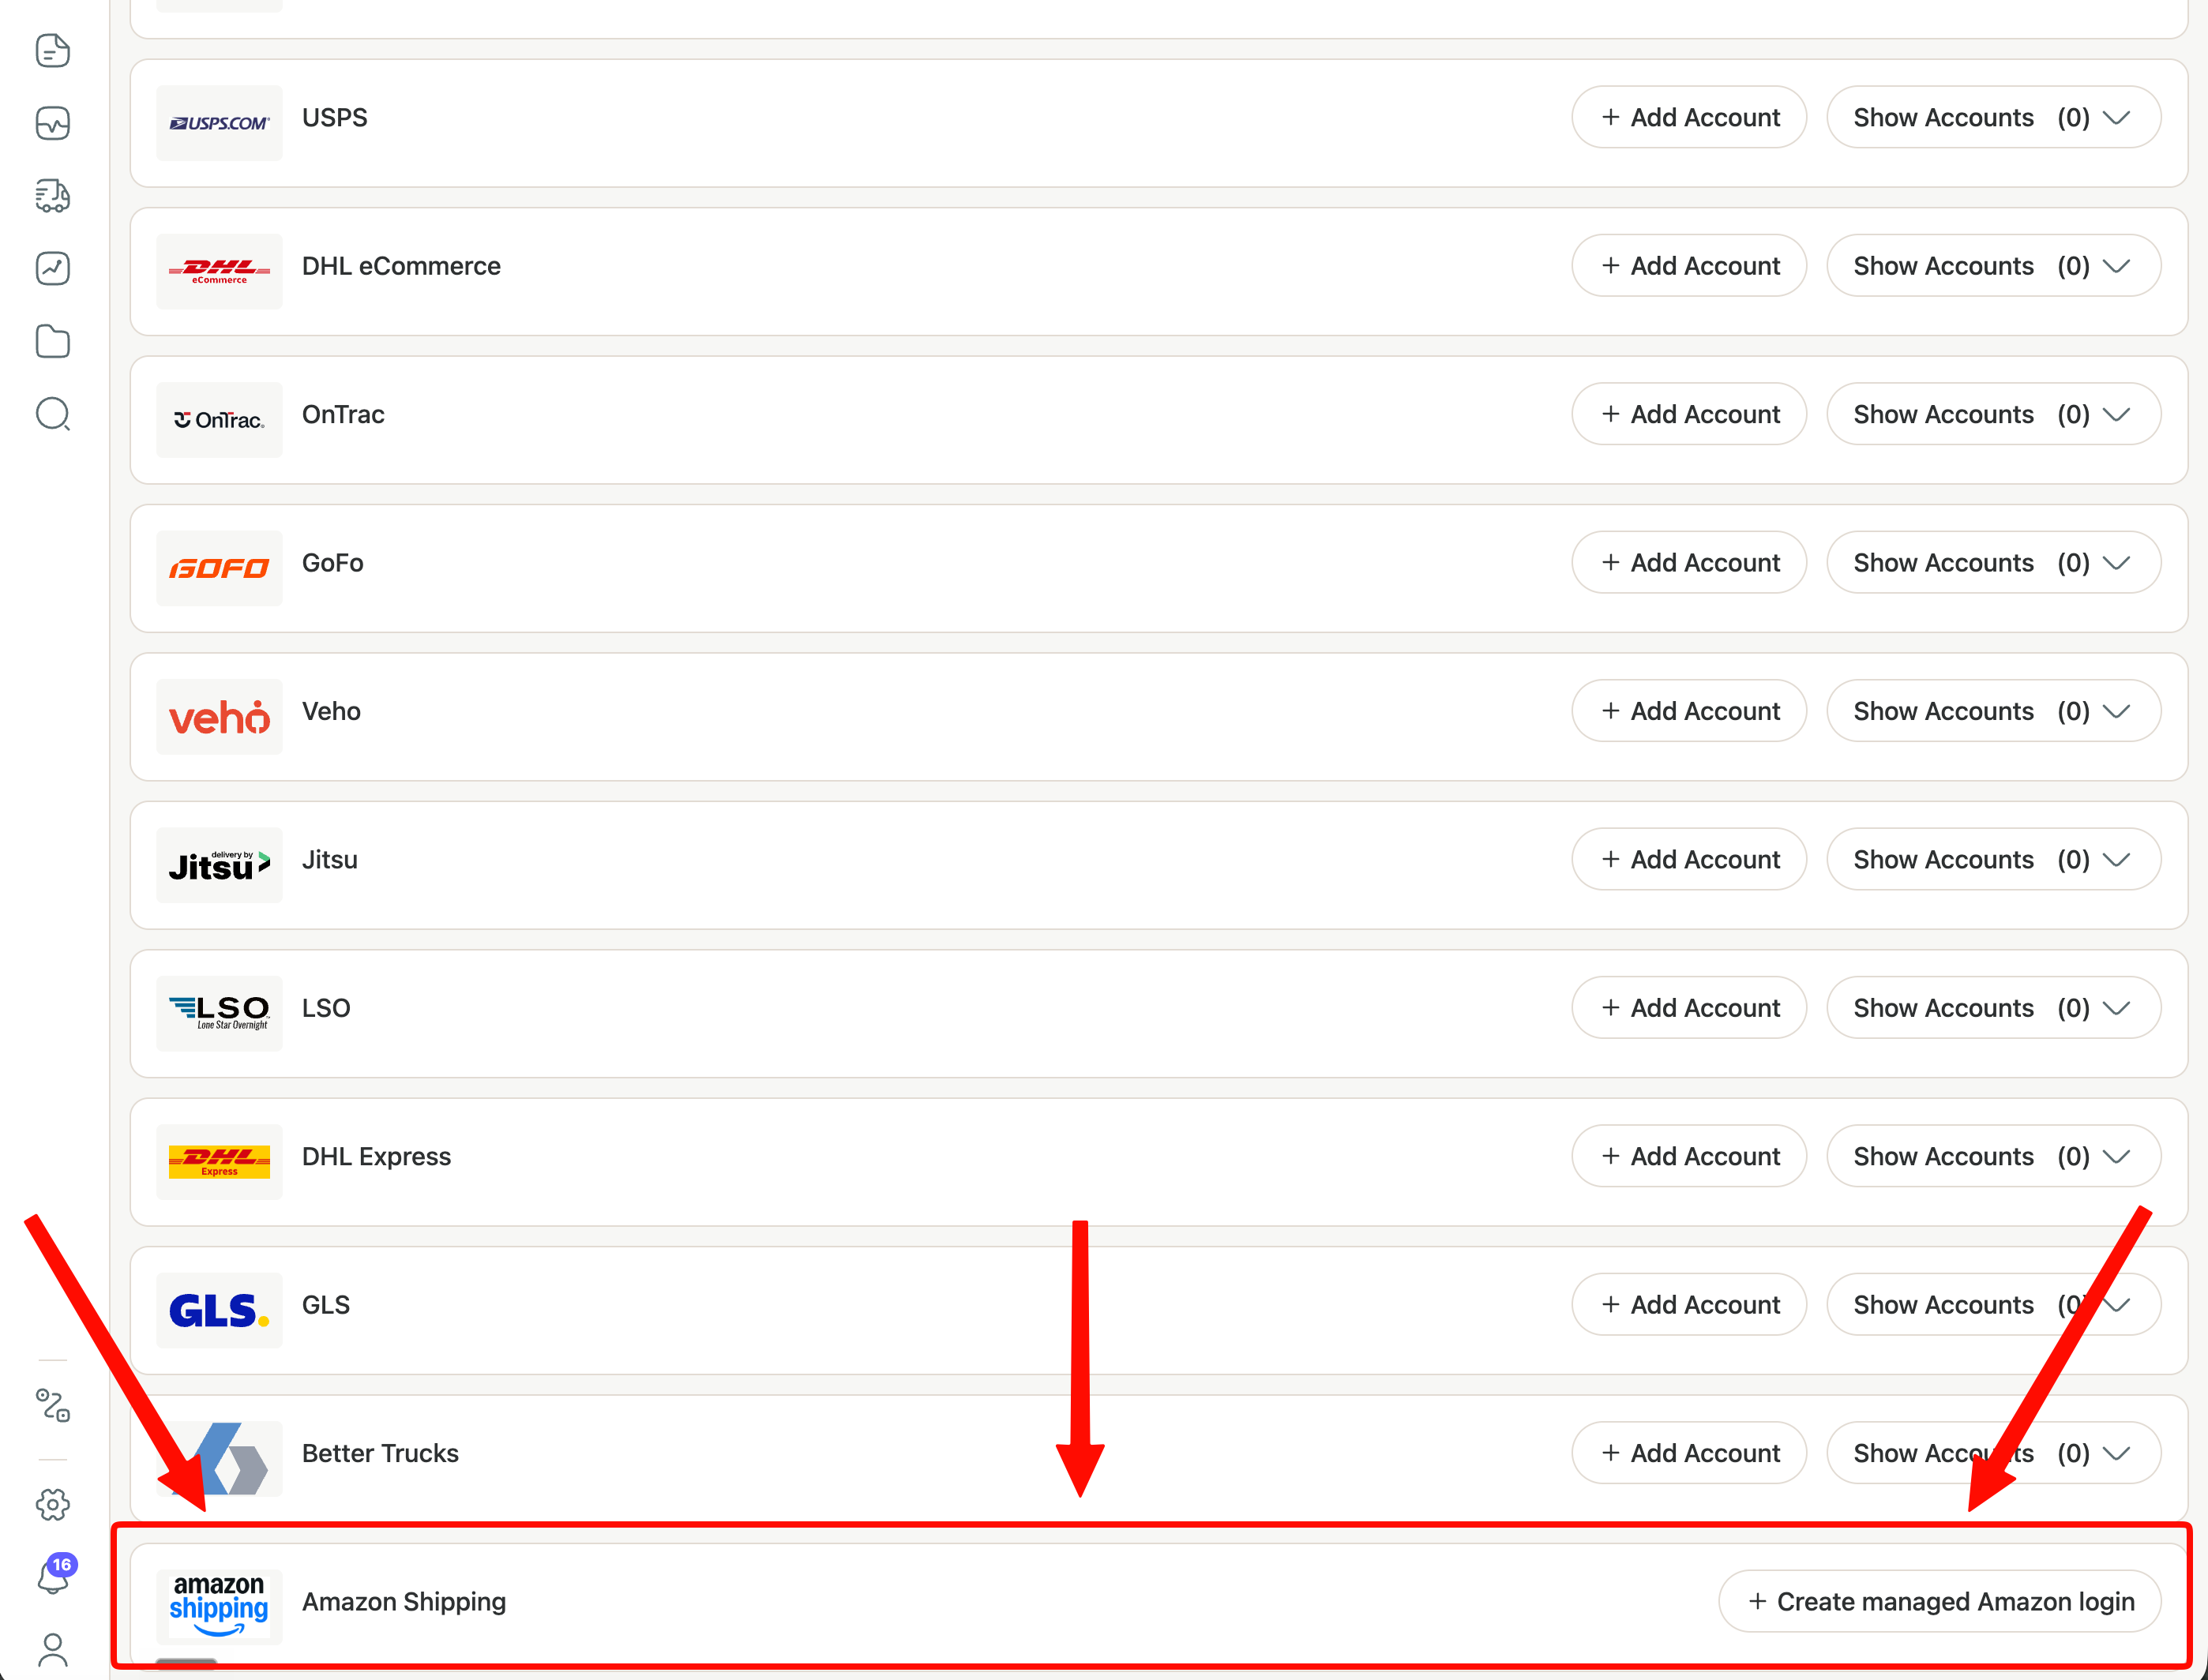
Navigate to Data Sources.
-
Locate "Amazon Shipping".
-
Click "+ Create managed Amazon login"
-
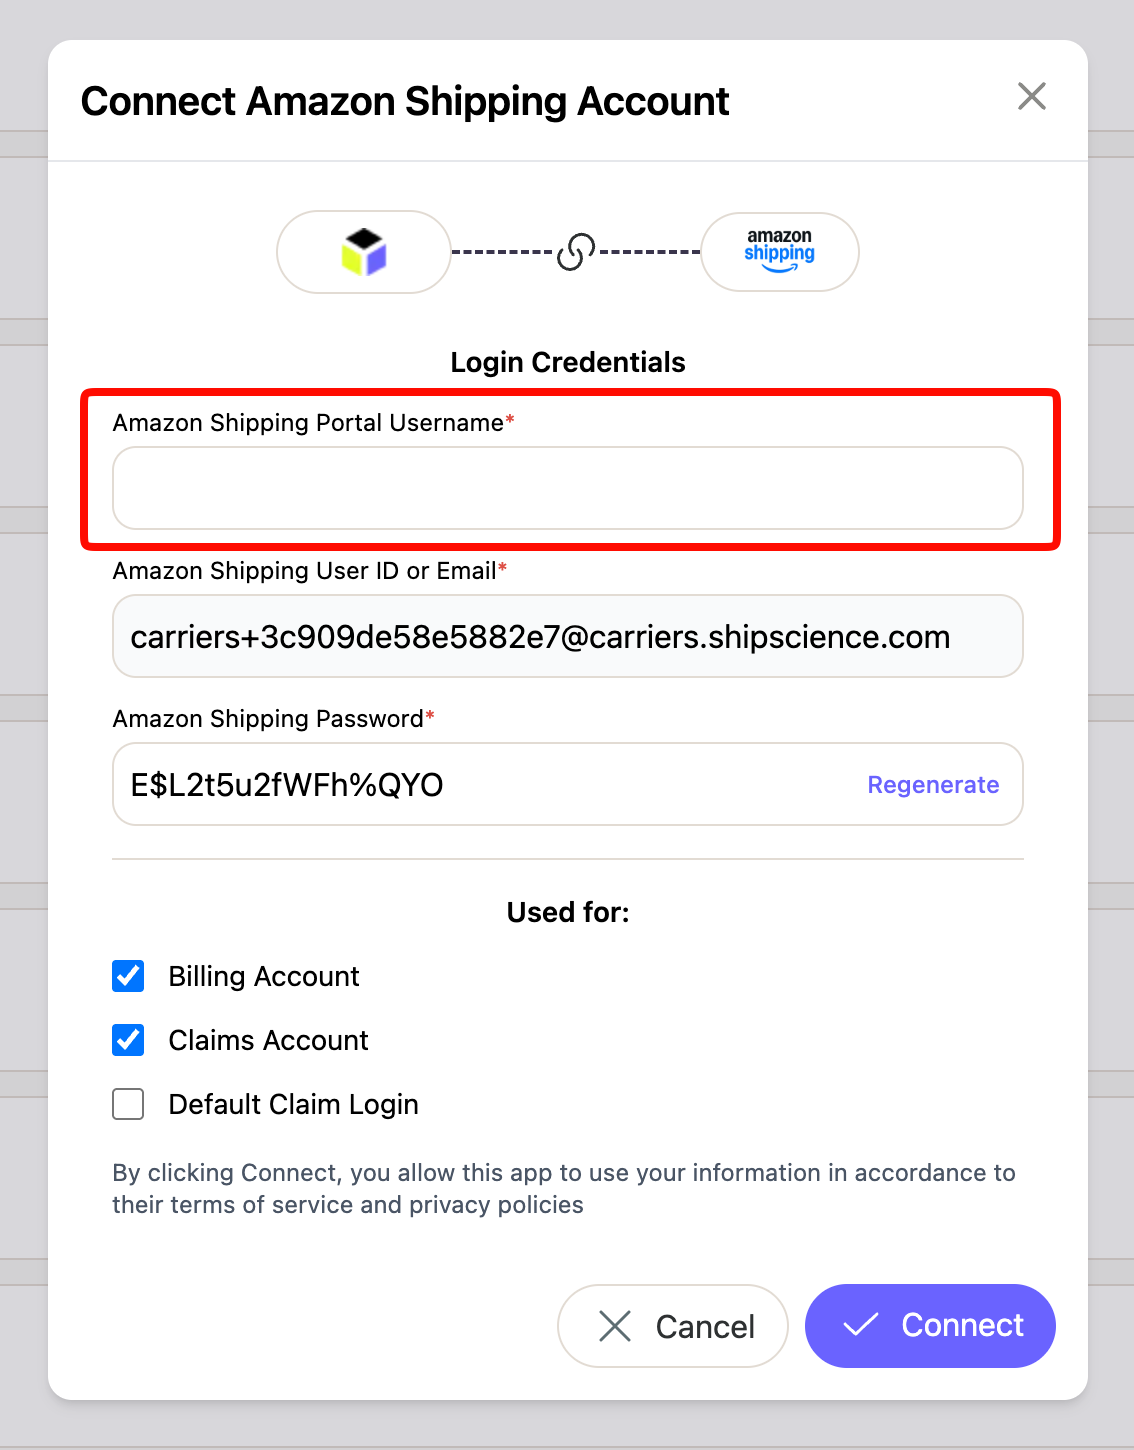
In Amazon Shipping Portal User Name, enter a name for the dedicated user. We recommend Claims Manager.
-
Important: Keep this tab open. You will need to copy these login details in Step 3.
Step 2: Navigate to Amazon Shipping Website
-
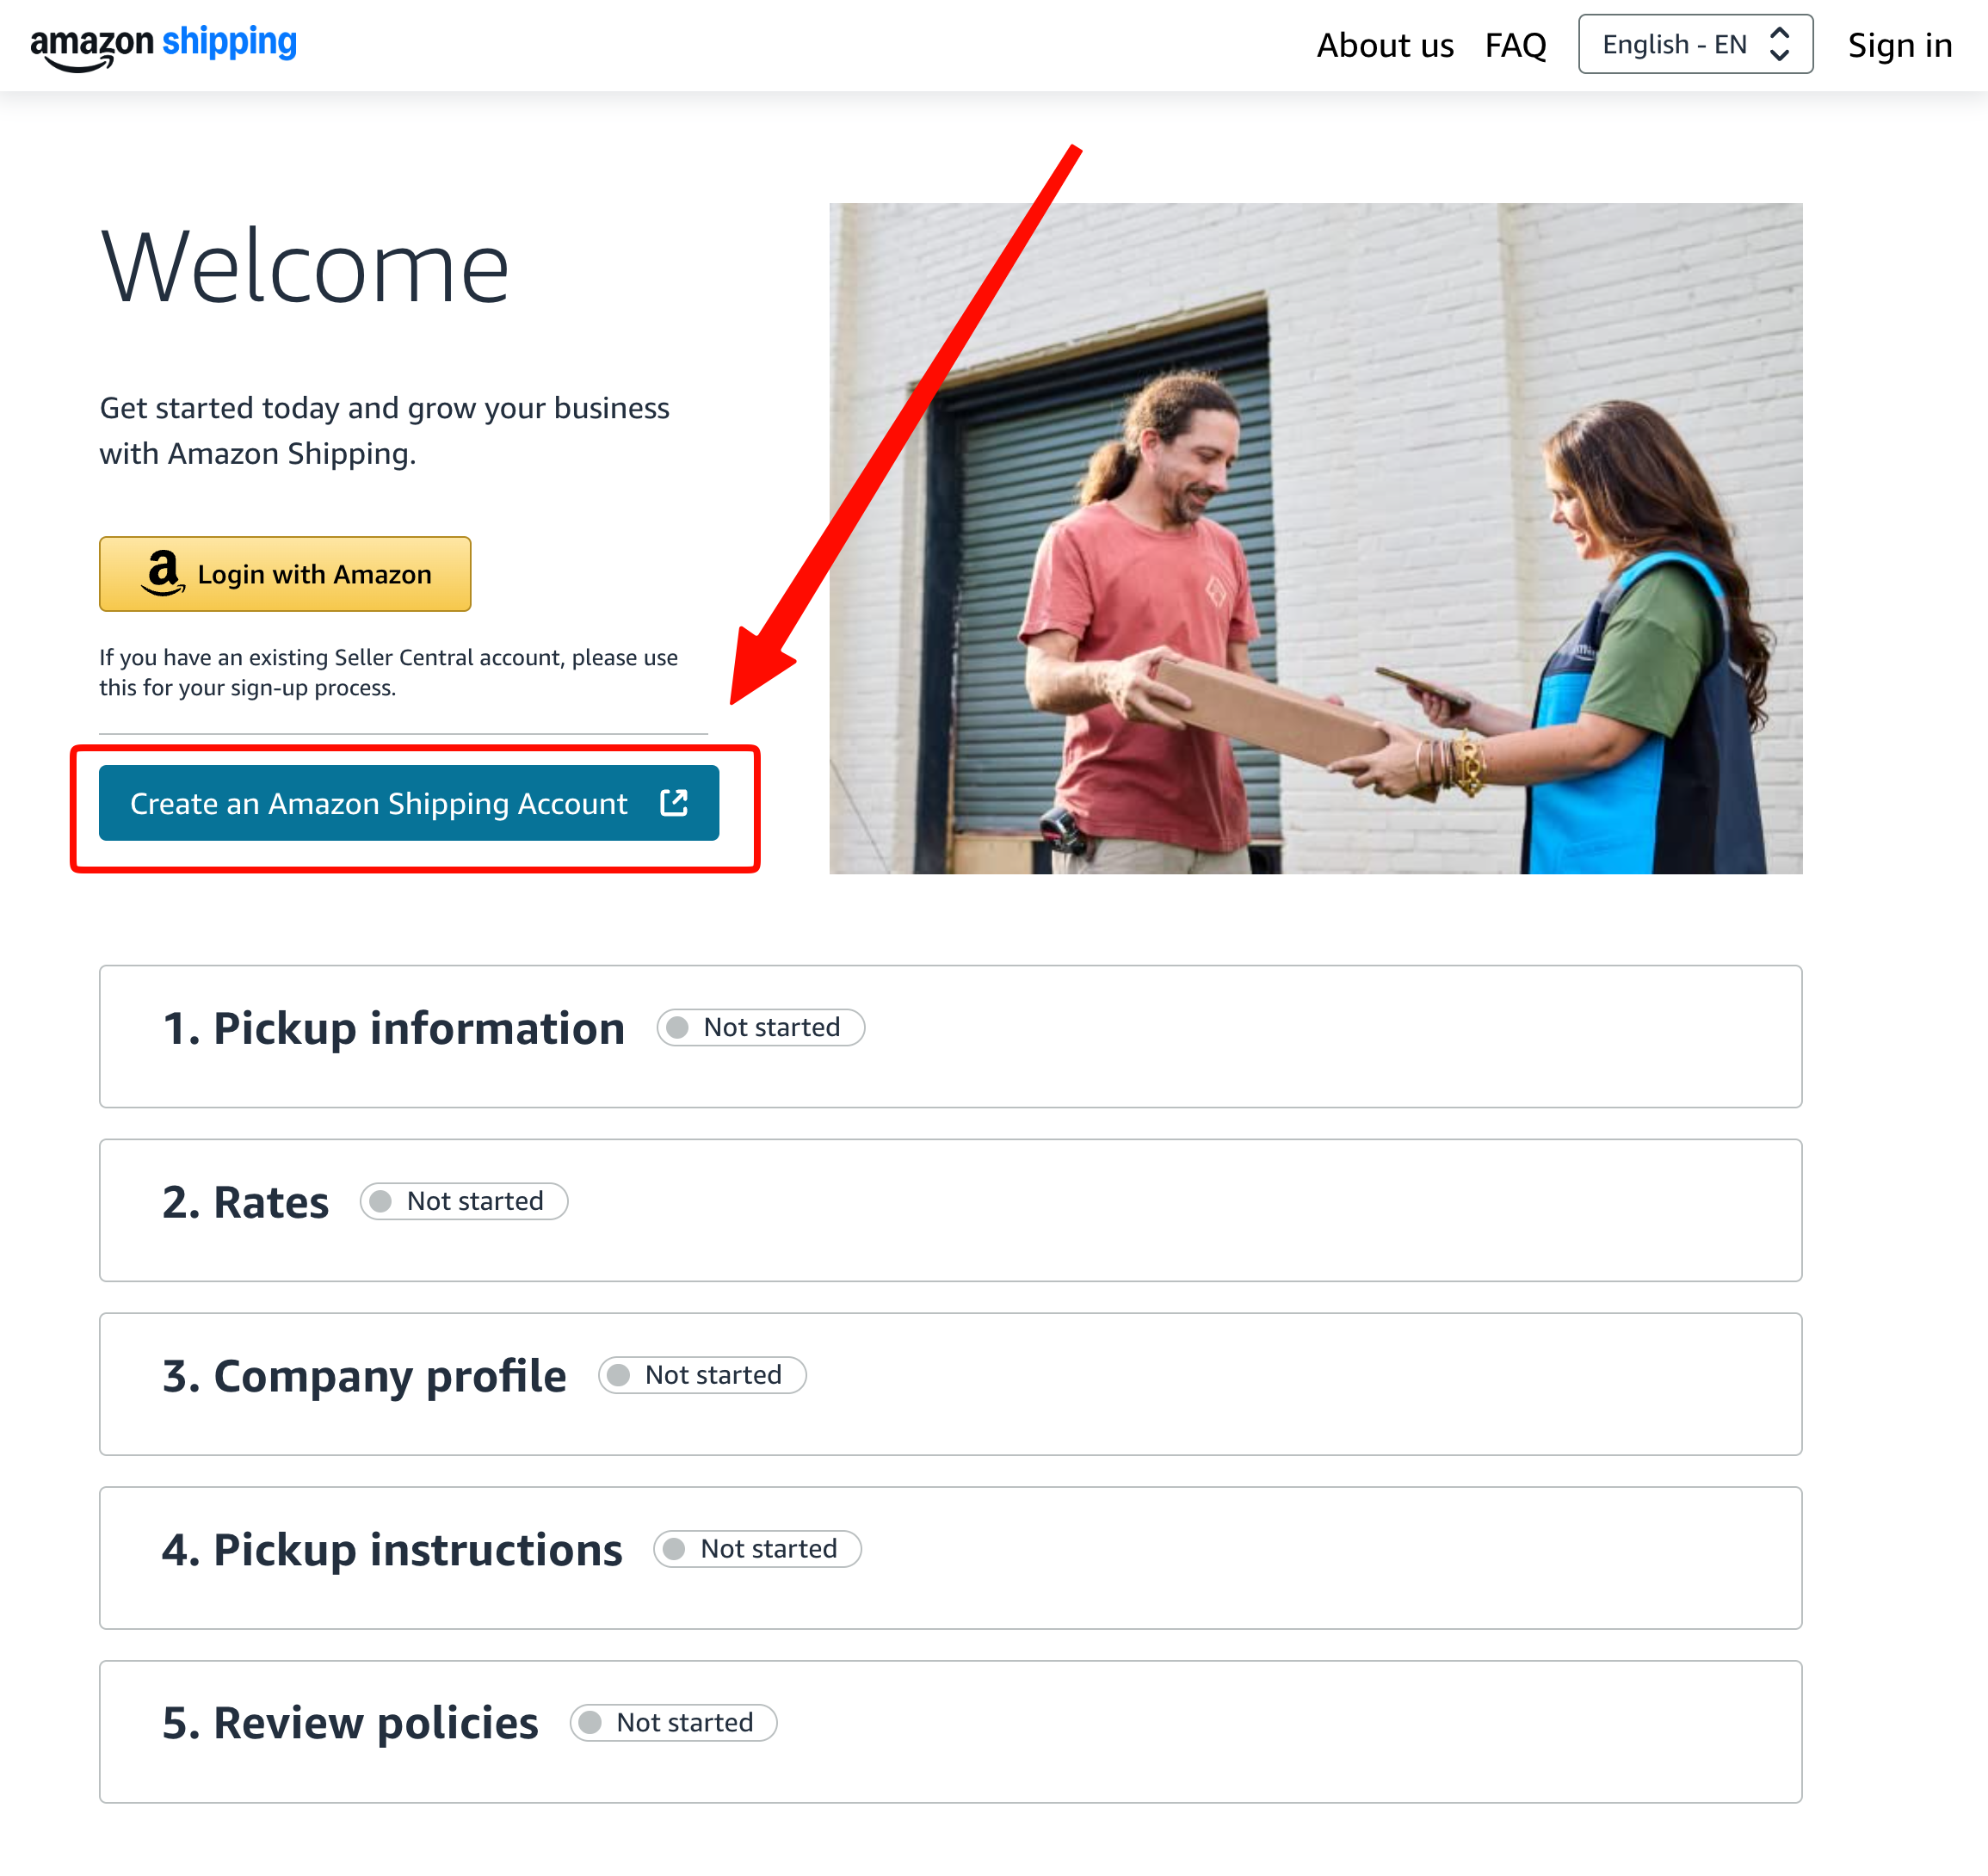
Navigate to the Amazon Shipping Website
-
Find and click on the button named "Create an Amazon Shipping Account"
Step 3: Sign Up for an Amazon Shipping Account
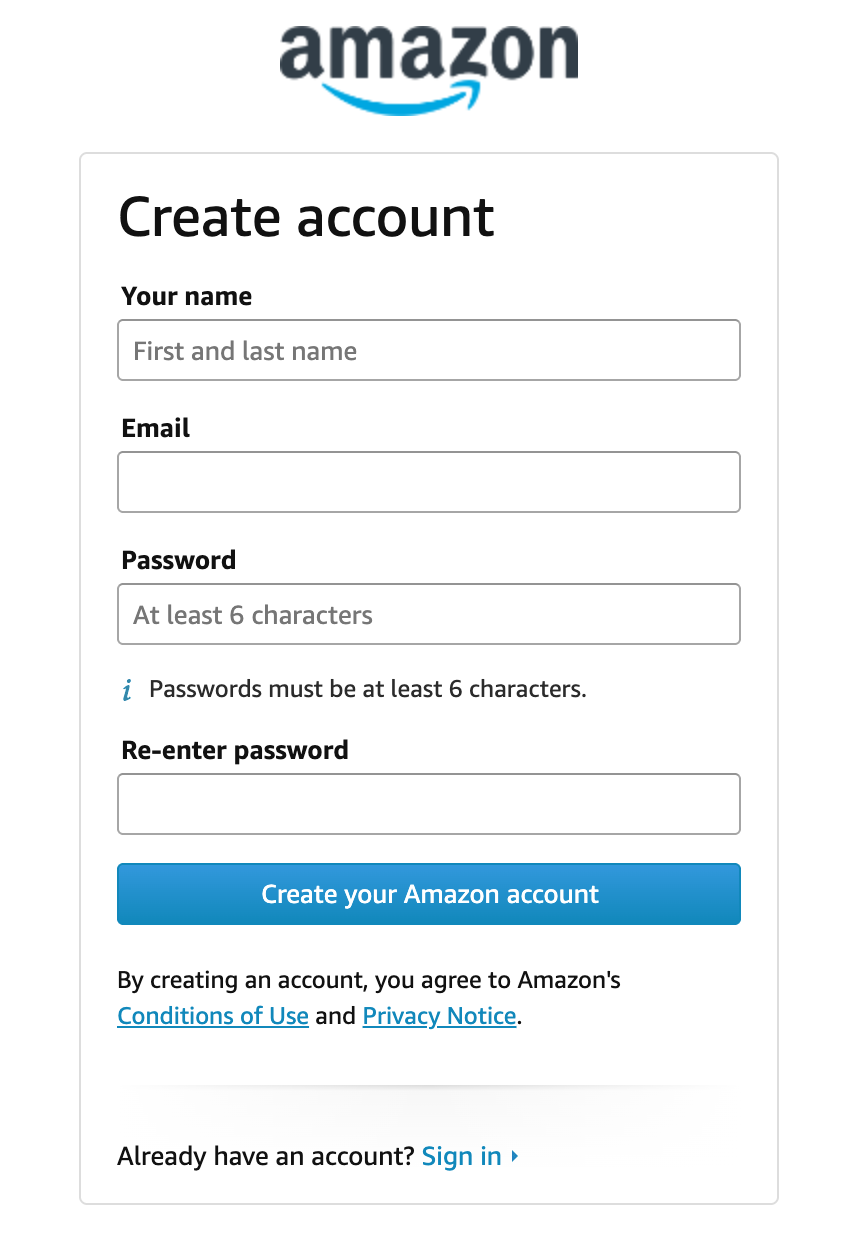
- For Your Name, enter the same name you used in Step 1.
- Example: Claims Manager
- For Email, copy and paste the Amazon Shipping User ID or Email from Step 1. This will be the long email address provided by ShipScience.
- Example: [email protected]
- For Password, enter the Amazon Shipping Password from Step 1.
- Example: E$L2t5u2fWFh%QYO
Step 4: Verify Your Email
Amazon will send a verification code to the dedicated email address used in Step 3.
Enter the code to confirm the account.
Step 5: Complete Phone Verification (2FA)
Amazon will send a 2FA code to the phone number configured in the Data Source section.
Note: this code can take a few minutes to arrive — a short delay here is normal.
Step 6: Ask an Amazon Shipping Administrator to Invite the New User
- If you are an Amazon Shipping administrator, simply invite the new user to your account.
- If you are not an administrator, send the new user's email address to someone who is.
- The administrator should send the invitation to the Amazon Shipping User ID or Email created in the previous steps.
- Example: [email protected]
Step 7: Accept the Invitation
Once the administrator sends the invite, log in to the dedicated Amazon Shipping account (using the email and password from Step 1) and accept the invitation.
Step 8: Connection Complete
After the invitation is accepted, the carrier connection is established. Your ShipScience admin will finalize the connection on your account.
Updated about 1 hour ago