
OnTrac
Connect OnTrac to ShipScience for Claims, Invoices, and Tracking
Overview
Connecting OnTrac to ShipScience requires two types of access:
- OnTrac portal access to retrieve invoices and submit claims
- Tracking data access through an API connection or SFTP feed
The recommended setup is to create a dedicated OnTrac portal user for ShipScience. ShipScience uses this account to download invoices and file claims through the OnTrac portal. Tracking data can be provided through either OnTrac API credentials or an existing SFTP integration.
Before you begin:
To complete the OnTrac connection, you may need assistance from:
- Your OnTrac portal administrator
- Your IT or technical team
- Your OnTrac account representative
Before beginning, confirm that you can:
- Invite a new user to your OnTrac portal account
- Grant the user access to all required accounts, locations, and invoice data
- Request OnTrac tracking API credentials, if using an API connection
- Provide SFTP connection details, if using an SFTP tracking feed
NOTE: The dedicated ShipScience portal user should have access to the invoices and claims functionality required for all applicable OnTrac accounts.
Connect OnTrac to ShipScience
Complete the following two parts:
- Part 1: Create and invite a dedicated OnTrac portal user
- Part 2: Configure tracking data access
NOTE: Both parts are required for ShipScience to match invoice activity with tracking events and identify eligible shipments for claims.
Part 1: Create and Invite a Dedicated OnTrac Portal User
ShipScience uses a dedicated OnTrac portal login to retrieve invoices and submit claims.
Step 1: Generate Your ShipScience Email Address
-
Sign in to the ShipScience Web Application.
-
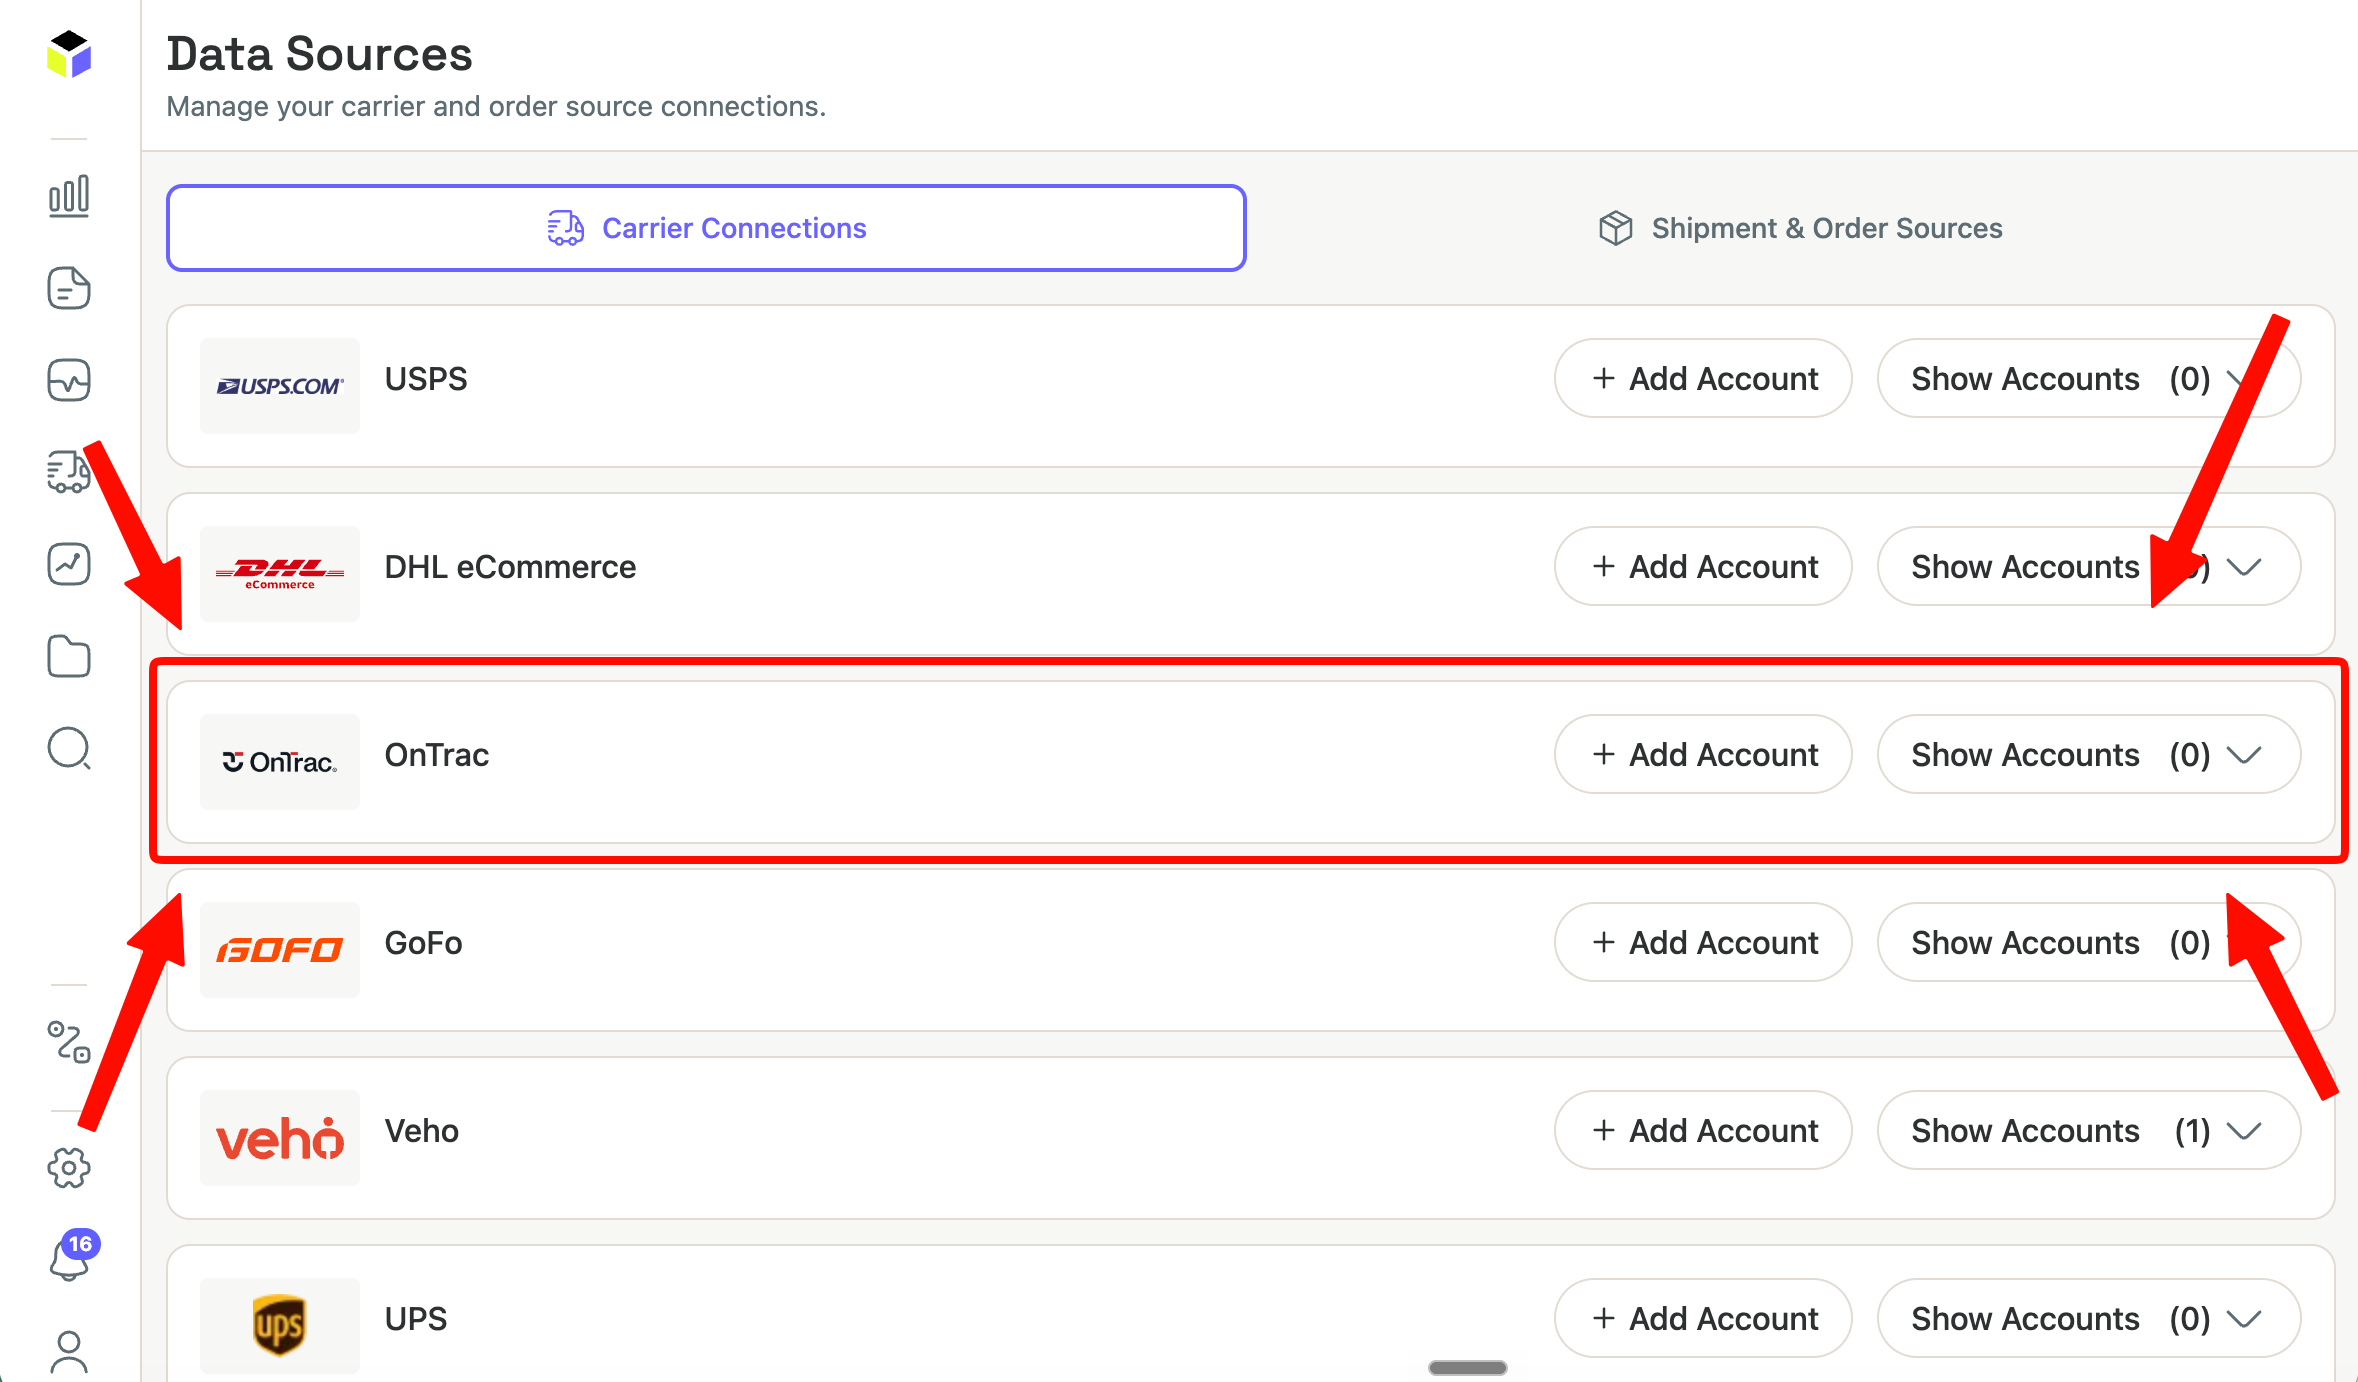
Navigate to Data Sources.
-
Locate "OnTrac".
-
Click "+ Add Account"
-
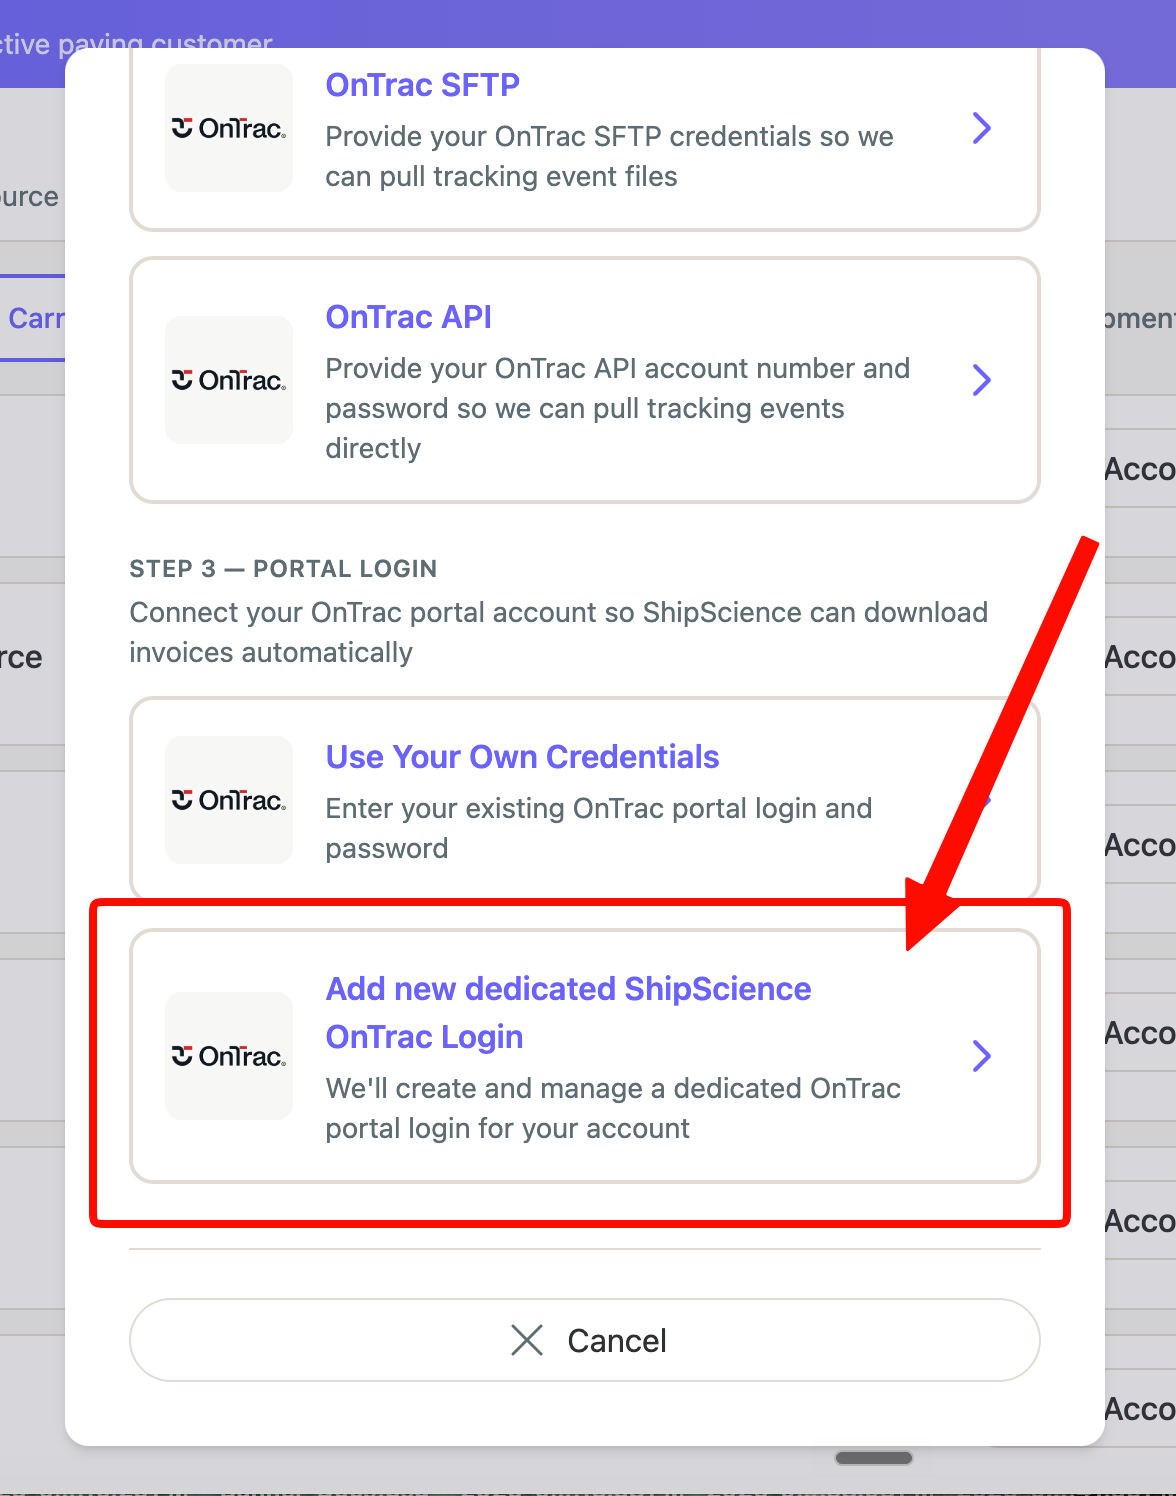
Scroll down and click on "Add new dedicated ShipScience OnTrac Login"
- Copy the generated ShipScience email address to your clipboard.
- For example: [email protected]
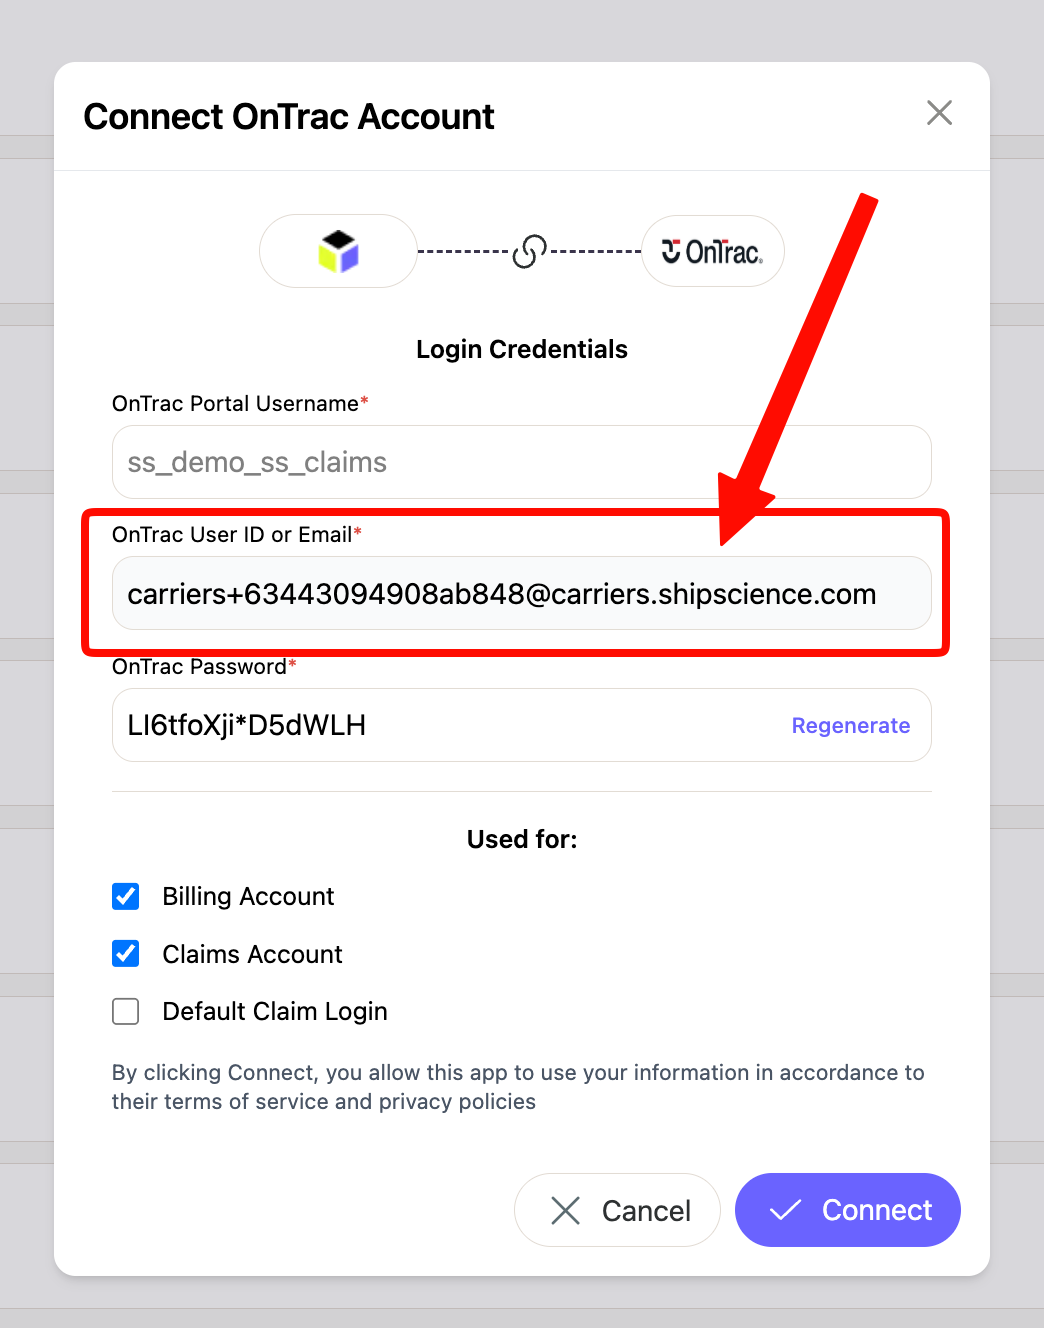
- Click "Connect" to save the connection
NOTE: This email address is unique to your OnTrac connection and should only be used for the dedicated ShipScience portal user. You do not need to create or activate the OnTrac user before inviting the generated email address.
Step 2: Invite the New ShipScience Email to the OnTrac Portal
Log in to the OnTrac portal using an administrator account and invite the generated ShipScience email address as a new user.
- The invited user should have permission to:
- View and download invoices
- Access all applicable OnTrac accounts and shipping locations
- Review shipment information
- Create and manage claims
NOTE: After the invitation is sent, the ShipScience support team will receive the activation email, complete the account setup, and create a password for the dedicated login.
REMINDER: Do not use an employee’s personal OnTrac login. A dedicated ShipScience user helps prevent interruptions when employees change roles, passwords are reset, or individual accounts are disabled.
Step 3: Verify Portal Access
After sending the invitation, notify the ShipScience team. ShipScience will activate the account and confirm that the dedicated login can:
- Access the OnTrac portal
- View the required accounts
- Download invoices
- Access the claims workflow
NOTE: The ShipScience team may contact you if additional permissions are required.
Part 2: Configure Tracking Data Access
ShipScience requires OnTrac tracking data to retrieve shipment events and delivery updates.
Tracking data can be provided through either:
- Option 1: OnTrac API credentials
- Option 2: An SFTP tracking feed
Use the option that is already available to your organization or recommended by your OnTrac representative.
Option 1: Connect Using OnTrac API Credentials
Contact your OnTrac account representative and request API credentials that:
- Are associated with your OnTrac account
- Provide access to shipment tracking data
- Cover all applicable accounts and shipping locations
You can use the following request:
Please provide API credentials that ShipScience can use to retrieve tracking information for our OnTrac shipments. The credentials should include tracking access for all accounts and shipping locations associated with our organization.
After receiving the credentials:
- Sign in to the ShipScience Web Application.
- Navigate to Data Sources.
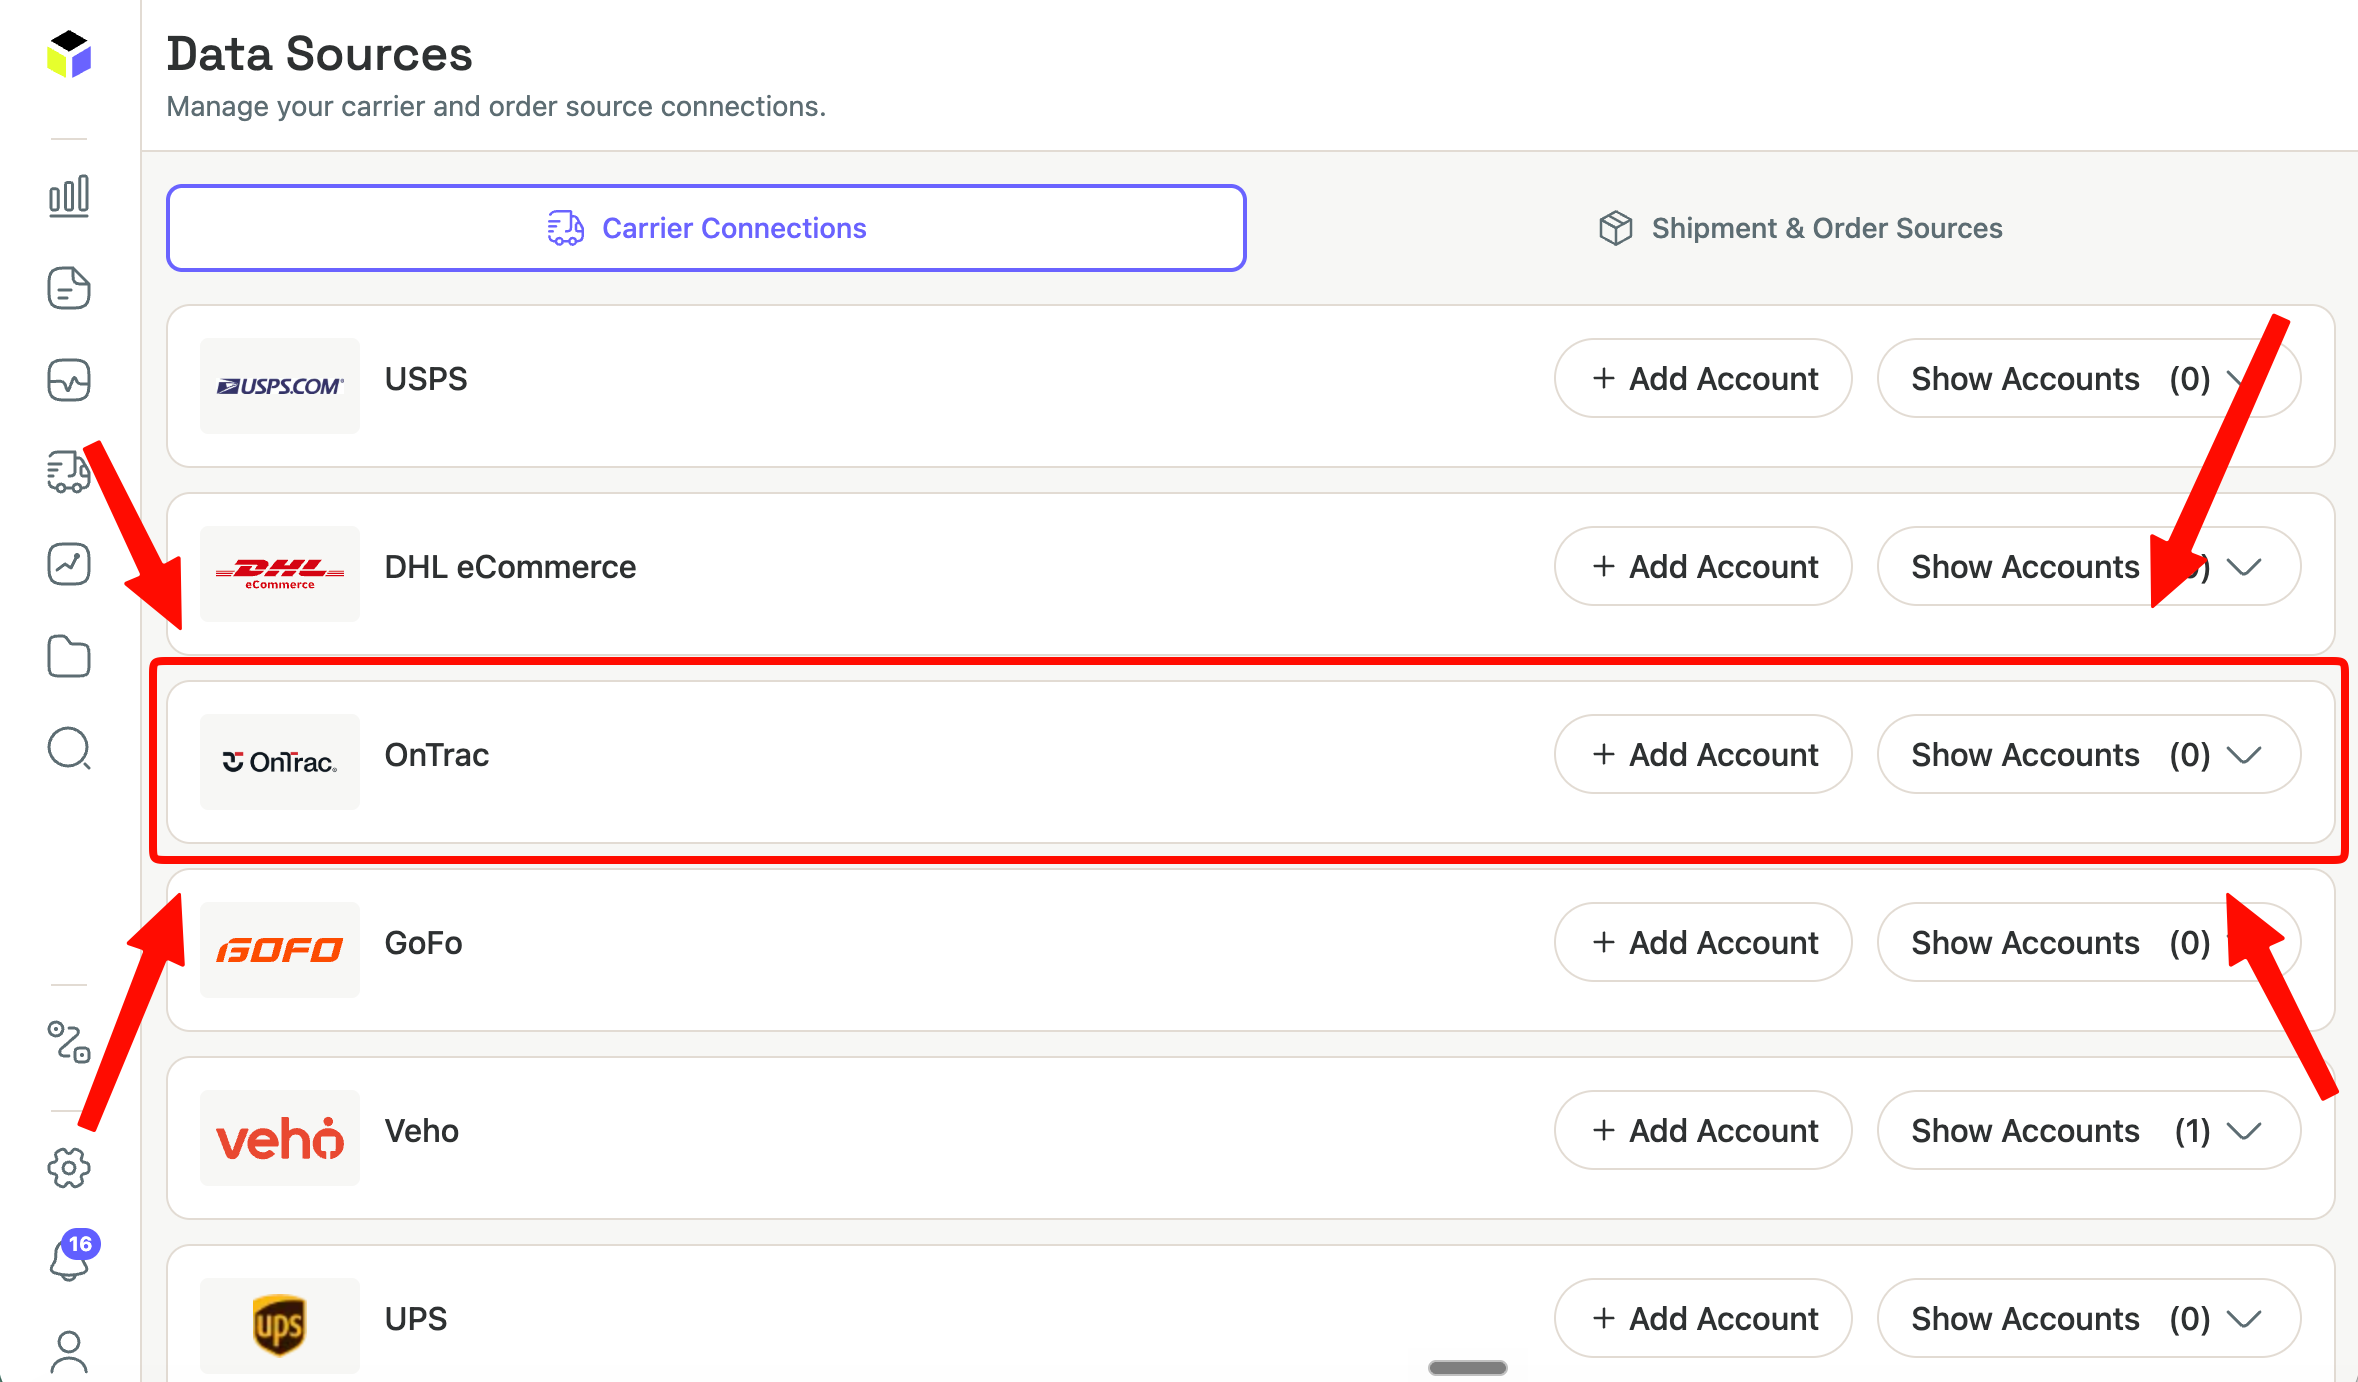
- Locate "OnTrac".
- Click "+ Add Account"
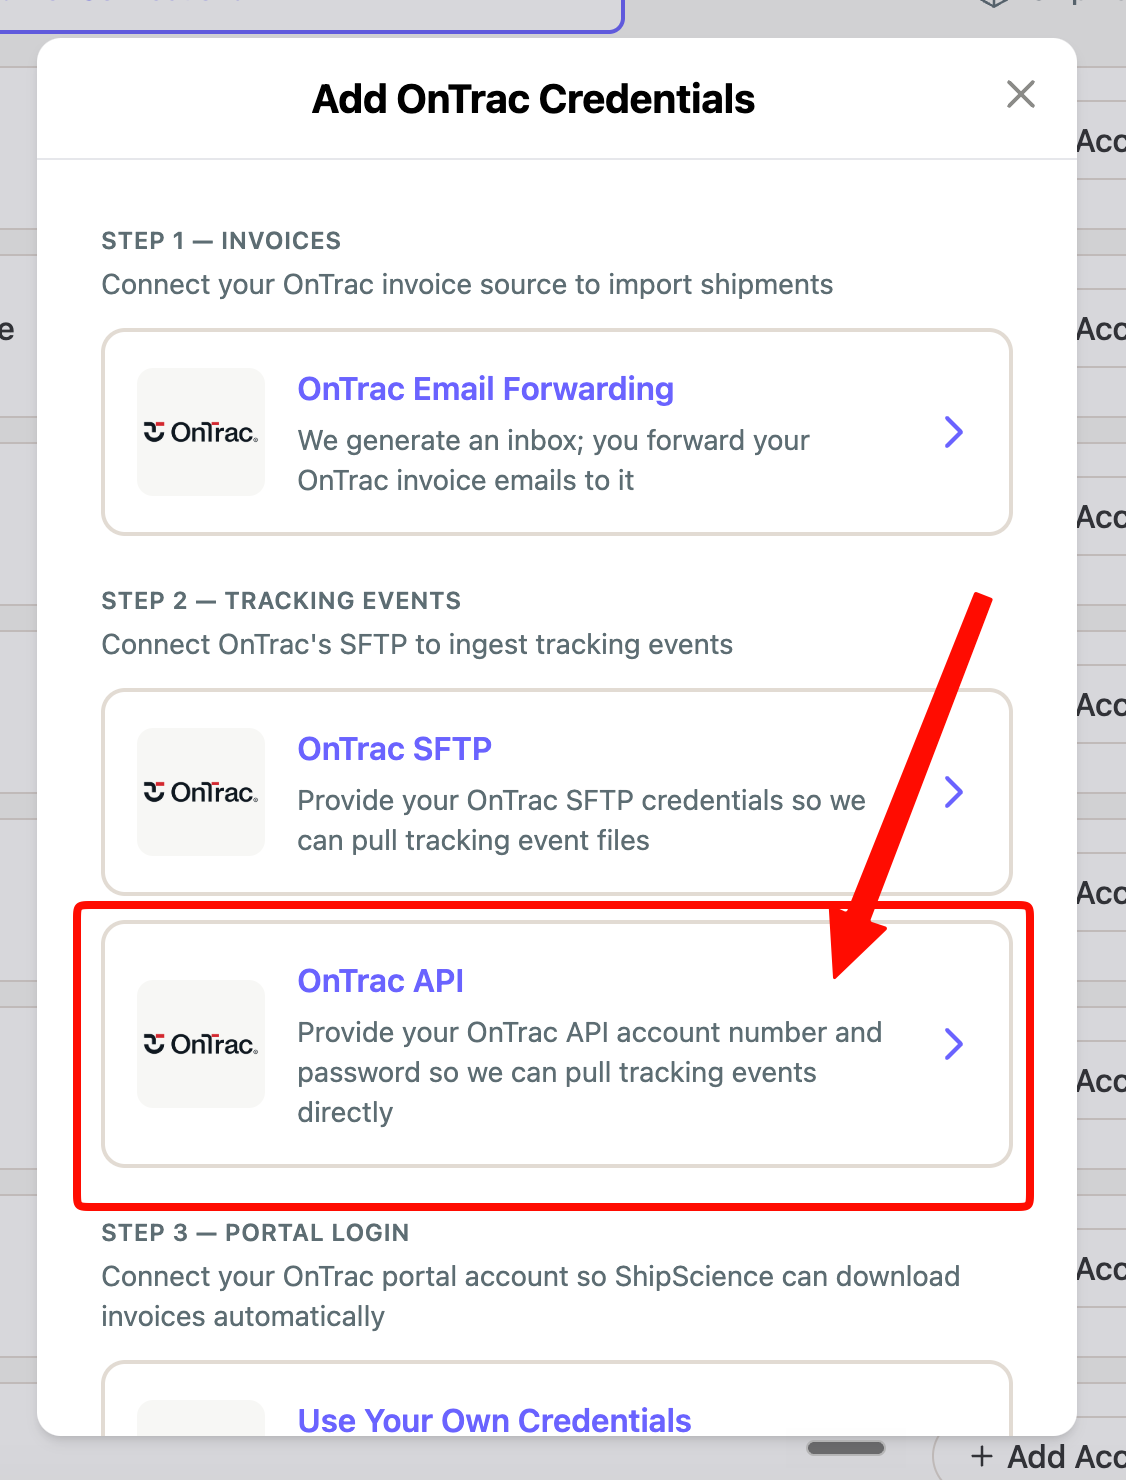
- Click on "OnTrac API"
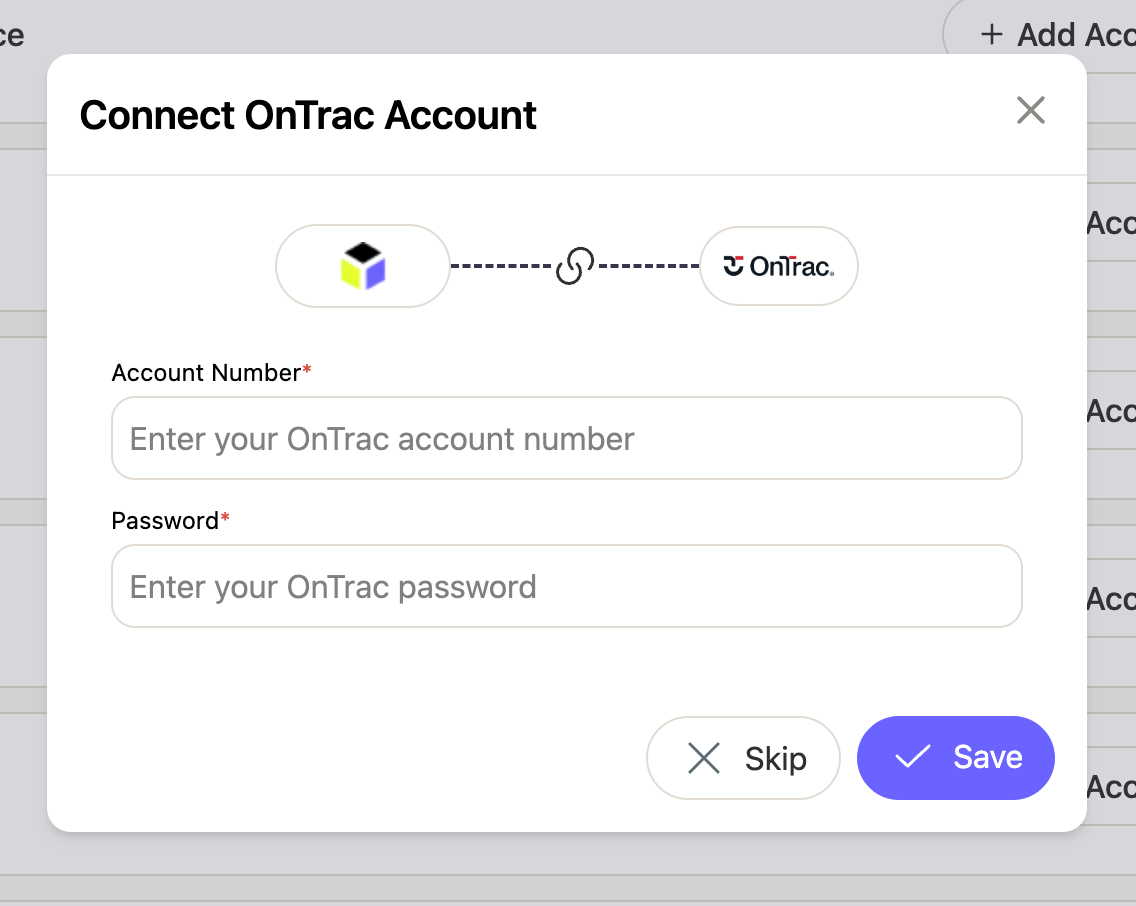
- Enter the credentials provided by OnTrac.
- Click Save to create the connection.
NOTE: ShipScience will validate the credentials and begin retrieving tracking events. API configuration may not appear until API support has been enabled for your ShipScience account. Contact the ShipScience team if the option is not available.
Option 2: Connect Using SFTP
Use this option if your organization already receives OnTrac tracking data through SFTP(Secure File Transfer Protocol -- i.e. .CSV, .JSON, or .XML).
- Sign in to the ShipScience Web Application.
- Navigate to Data Sources.
- Locate "OnTrac".
- Select the SFTP tracking option.
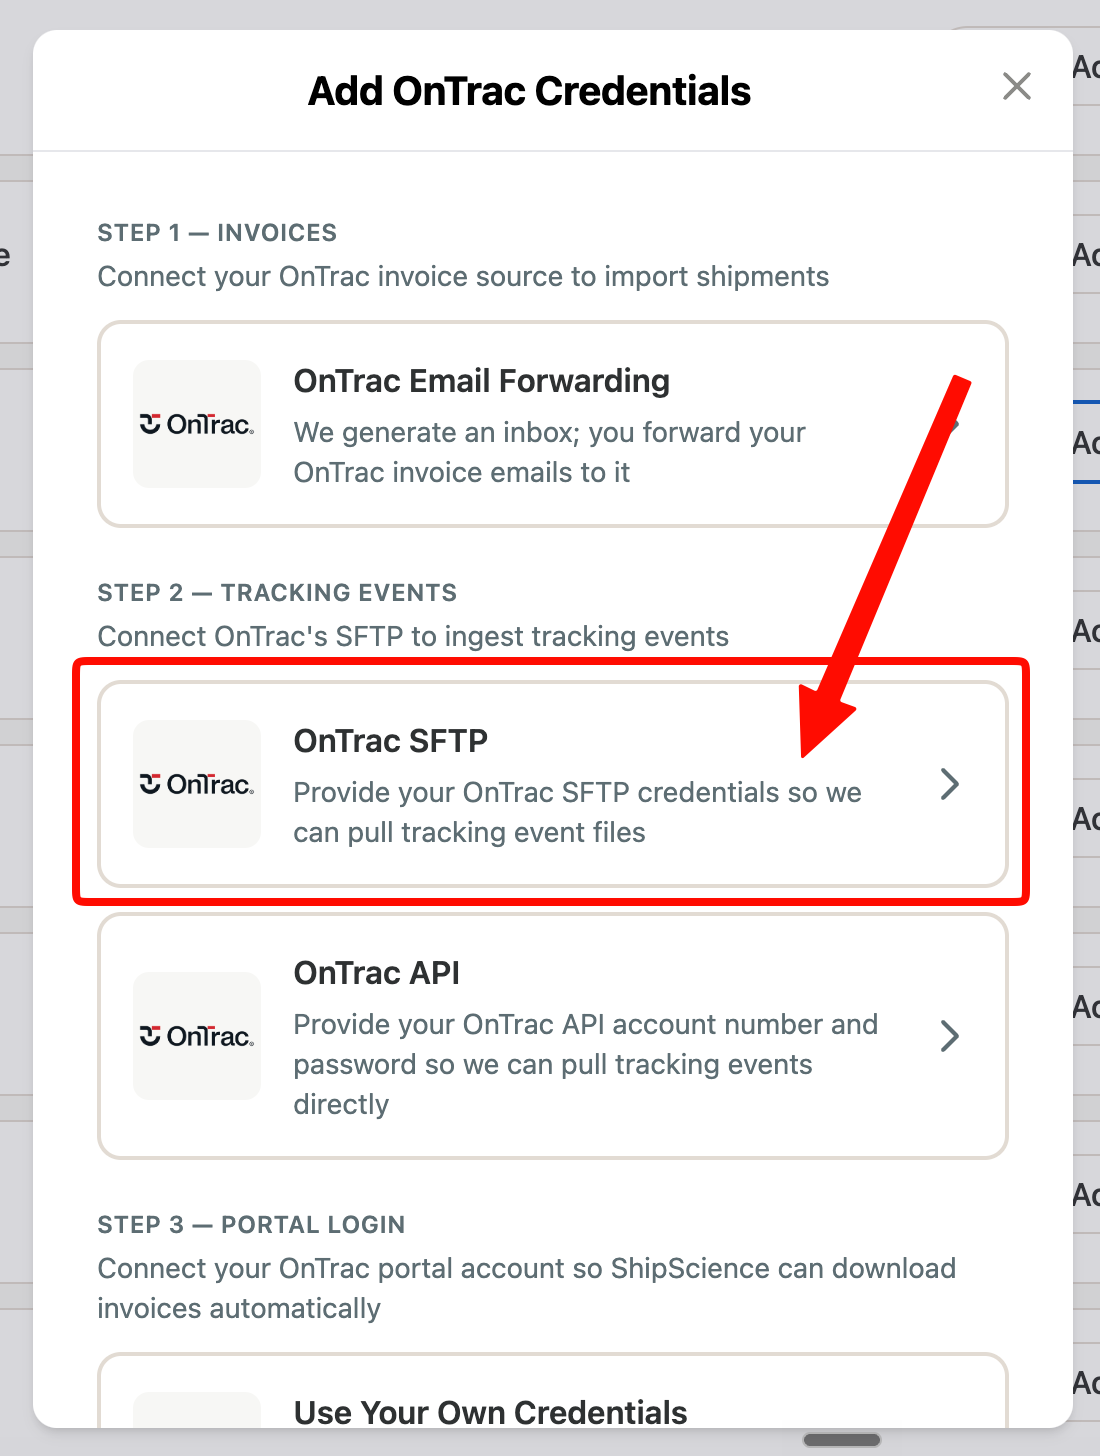
- Enter the requested SFTP connection details.
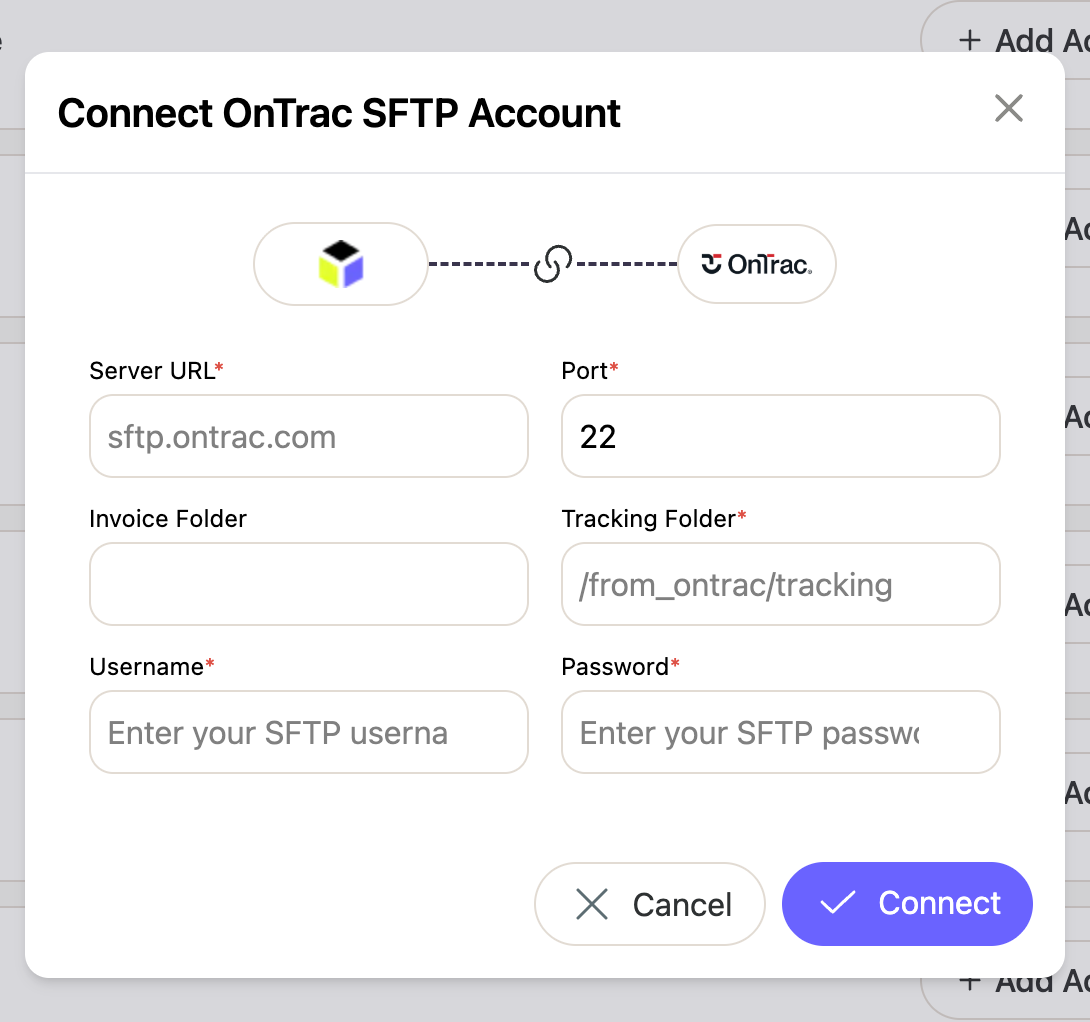
- Click "Connect" to save the connection.
The required details may include:
- SFTP host
- Port
- Username
- Password or SSH key
- File directory
- File naming convention
NOTE: Your IT team may need to provide or confirm these values. ShipScience will validate the connection and confirm that the tracking files can be retrieved and processed.
Updated about 2 months ago